A good RIP is like a good cutting blade. You don’t think about it when it’s working. You think about it a lot when it’s not. This ONYX RIP review is for sticker shops and wide-format printers trying to decide if ONYX is the right “brain” for print-and-cut, color control, and automation, or if Flexi, Caldera, Wasatch, Fiery XF, or an OEM RIP is the better fit.
I’ll focus on what matters for sticker production: contour cutting, cut drift prevention, nesting, repeatability, and the “make it idiot-proof” automation that keeps jobs consistent across a team.
What ONYX is (and the product lineup in plain English)
ONYX is really a family of RIP products built around a core workflow: feed jobs into RIP-Queue, apply consistent settings, print, and (if needed) pass the cutting data to the right finishing step.
Most sticker shops run into these options:
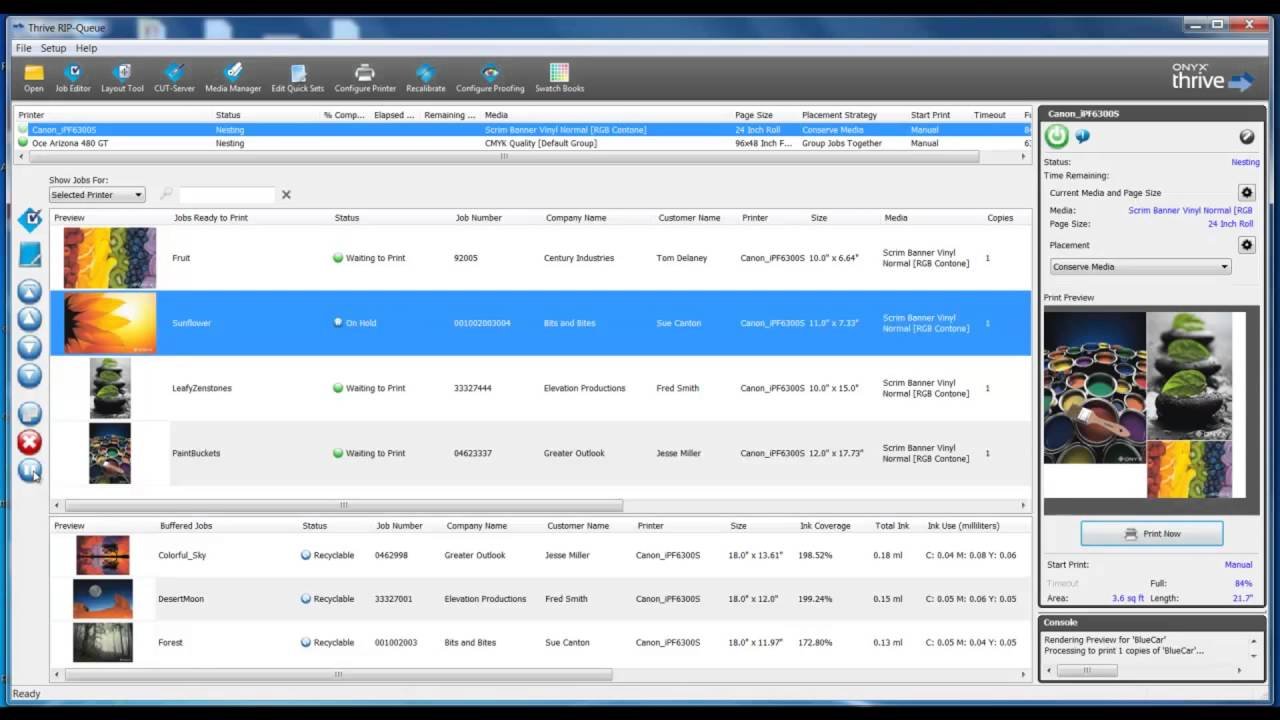
- ONYX Thrive: the scalable, networked “big shop” option. Built around a PDF workflow and designed to manage production across devices and operators.
- ONYX PosterShop: a full-featured print workstation RIP that’s meant to be powerful without the full networked Thrive architecture.
- ONYX RIPCenter: the simpler “get started, stay stable” option for wide-format print production with less complexity.
- ONYX Go (Lite / Plus): subscription versions that are meant to be easier to buy, easier to scale, and run month-to-month.
That lineup matters because the right ONYX choice is less about “what’s best” and more about how your shop is structured. One workstation? Multiple printers? Multiple operators? Separate cutter? Table cutter with barcodes? Those answers change everything.
Sticker workflow basics in ONYX: RIP-Queue, Job Editor, and CUT-Server
ONYX is workflow-first. It assumes you want repeatable output more than you want a fancy design UI.
Here’s how the parts usually map to sticker production:
- RIP-Queue is where jobs land, get processed, and get printed. It’s also where settings get enforced, which is what keeps output consistent.
- Job Editor is there for practical fixes. Think cropping, scaling, tiling, marks, and quick adjustments. It’s not Illustrator, but it saves you from bouncing back to design software for every small thing.
- CUT-Server is the bridge to cutting devices in many print-and-cut setups. It’s the thing that takes the recorded cut data and communicates with cutters so cuts land where they should.
If you’re coming from an OEM RIP (like VersaWorks or RasterLink), the big mindset shift is that ONYX wants you to build a system: presets, automation, and standardized job rules that keep humans from freelancing settings.
Contour cutting: where ONYX usually earns its keep
Sticker printing lives on contour cutting. Clean cutlines, correct scaling, and consistent registration are the difference between “sellable” and “trash bin.”
ONYX’s contour cutting approach is straightforward:
- Your file contains a specially prepared spot color that represents the cut path.
- When you print the job, ONYX does not print that cut path, but it records the cut data.
- That cut data is then used by the cutter workflow so the cutter knows exactly where to cut.
ONYX supports different print-and-cut styles, including print-and-cut on the same device, printing on one device and cutting separately, and workflows that integrate with i-cut style systems.
This matters for stickers because contour cutting issues are rarely “mystical.” They’re usually one of these:
- The cutline was not detected correctly (spot color naming or setup issues)
- The job got scaled differently than the cut data
- Registration marks were wrong for the cutter’s expectations
- The operator used the wrong preset
ONYX can’t stop you from making bad art files. But it can absolutely stop “wrong preset” problems if you set it up right.
Quick Sets and Hot Folders: ONYX automation that saves real time
If ONYX has a superpower, it’s automation. This is the part that makes high-volume shops love it.
Quick Sets
A Quick Set is basically a locked “recipe” for a job. It can include things like:
- media and print mode
- marks and bleed behavior
- nesting and layout defaults
- contour cutting behavior and cutter selection
- job scaling rules and copies
When Quick Sets are done well, you stop relying on memory. That’s huge in sticker production because the same mistake can cost you an entire roll of vinyl.
Hot Folders
Hot Folders are the “hands-off” version of that idea. ONYX can monitor a folder and automatically apply the right Quick Set when a file appears. The job gets moved into RIP-Queue, processed, and printed using the preset rules.
In sticker shops, Hot Folders usually become the “production lane” system. Example lanes:
- Stickers vinyl gloss print-and-cut
- Stickers vinyl matte print-and-cut
- Clear stickers with white ink underbase
- Kiss-cut sheets with specific marks
- Cut-only reruns
If your shop is trying to reduce training time and reduce reprints, this is one of the strongest arguments for ONYX.

Color management: ICC profiles, repeatability, and ColorCheck
Most people buy a RIP because of workflow. They keep it because of repeatability.
ONYX leans hard into ICC-based color management and tools that help shops keep output stable across time, media, and devices. If your stickers look different every week, it’s usually not “the printer being moody.” It’s inconsistent settings, drifting calibration, media changes, or profiles that never got revisited.
ONYX also has tools like ColorCheck, which is built to help evaluate print accuracy and consistency day to day. The point is process control. You print a control swatch, measure it, and confirm the output is still within expectations. That’s not glamorous, but it is exactly how you avoid the slow creep into “why is this black not the same black.”
If you run multiple printers of the same model, this gets even more important. Consistency across devices is one of the hardest real-world problems in sticker production, especially once volume ramps up.
Nesting and layout: media savings without chaos
Stickers are small. That’s why nesting matters.
ONYX supports automated nesting and job previews designed to help save media and reduce manual layout work. If you’re ganging lots of sticker jobs onto a roll, the combination of nesting plus presets is where ONYX starts to feel like a production system instead of “software you click around in.”
The caution here is simple: nesting is only “free money” when your preset rules are correct. If your safe margins, spacing, or cut mark rules are off, you can nest yourself into a very expensive mistake. ONYX gives you the tools. You still have to set sane defaults.
ONYX Go vs PosterShop vs RIPCenter vs Thrive: which one fits sticker shops?
This is the part people usually want, so here’s the plain positioning.
ONYX Go (Lite / Plus)
Best for small shops that want a month-to-month subscription model and a clean entry point into ONYX workflows. ONYX Go Plus supports multiple active printers and multiple RIP processors, which matters if you’re running more than one device.
Tradeoff: it’s still ONYX. You’re buying into the workflow mindset, not a design suite.
ONYX RIPCenter
Best for shops that want to get started with ONYX production tools without going all the way up the ladder. It’s usually positioned as the “simple, powerful tools” option for wide-format workflows.
Tradeoff: you may outgrow it if you need deeper automation, more scalability, or more advanced workflow components.
ONYX PosterShop
Best for a shop that wants a full-featured workstation RIP with strong production tooling, but doesn’t necessarily need a networked multi-operator Thrive setup.
Tradeoff: if you want true networked scalability and bigger workflow control across teams and devices, Thrive is built for that.
ONYX Thrive
Best for high-volume shops, multi-device environments, and teams that want a scalable workflow with network-based licensing and a browser-based Production Manager style interface. It’s designed to manage jobs and devices with more “production floor” structure.
Tradeoff: it’s the most complex to set up and the easiest to misconfigure if nobody owns the system.
ONYX vs Flexi, Caldera, Wasatch, Fiery XF, and OEM RIPs
This is the comparison section, with the honest tradeoffs.
ONYX vs SAi Flexi
Flexi is the most common “all-in-one” alternative. It combines design tools with print-and-cut output and is often easier for smaller teams to live in because you can do quick design edits and production output in one place.
ONYX usually wins on workflow depth and production automation. Flexi often wins on convenience and the “one tool” feel.
If your team constantly needs to tweak layouts and cutlines at the RIP station, Flexi can feel smoother. If your team needs guardrails and automation to reduce mistakes, ONYX tends to shine.
ONYX vs Caldera (and PrimeCenter)
Caldera’s big strength is prepress automation and nesting pipelines, especially when PrimeCenter is in the mix. PrimeCenter is built to automate repetitive prep tasks like adding cut lines, bleed, marks, and generating layouts.
ONYX can automate a lot through Quick Sets and Hot Folders, but Caldera’s ecosystem is often the pick when your bottleneck is file prep and prepress consistency at scale.
ONYX vs Wasatch SoftRIP
Wasatch stands out in cutting workflows, especially table cutting and barcode-driven matching between prints and cut files. If your finishing workflow relies on scanning a barcode and having the cutter automatically pull the right cut file, Wasatch is built for that kind of production flow.
ONYX can integrate with cutters and i-cut style workflows, but if barcodes and table cutting are your world, Wasatch deserves a serious look.
ONYX vs Fiery XF
Fiery XF is the color control heavyweight in a lot of wide-format environments. Proof-grade controls, spot color handling, and modular options like cut marks or cut server are part of its core pitch.
ONYX has strong color tools too, especially when you use process control tools like ColorCheck, but Fiery XF is often chosen when strict standards, verification, and color compliance are the job.
ONYX vs OEM RIPs (VersaWorks, RasterLink, etc.)
OEM RIPs are often the simplest answer when you are fully committed to one brand ecosystem. They tend to be easier out of the box and tightly aligned to the printer’s expected workflows.
ONYX becomes attractive when you want:
- one RIP ecosystem across multiple brands or device types
- more automation and standardized presets
- a production system that scales beyond a single workstation
What I like about ONYX (and what annoys people)
Here’s the most human part of this ONYX RIP review.
The good
- Automation is the real win. Quick Sets and Hot Folders can eliminate a lot of operator mistakes.
- Contour cutting workflows are mature and flexible.
- It’s built for production, not hobby use.
- Tools like ColorCheck support the boring but necessary work of keeping output consistent.
The not-so-fun parts
- ONYX is not trying to replace a design app. If you want heavy design changes at the RIP station, you may hate that.
- Like any workflow-heavy RIP, you can absolutely misconfigure it and create “mystery problems” until someone cleans up the presets.
- The learning curve is mostly about building a clean system. If your shop avoids documentation, ONYX can feel like a lot.
Who should buy ONYX for sticker printing?
ONYX makes the most sense when:
- you run real print-and-cut volume
- you want automation and repeatable presets
- you have multiple operators or want faster training
- you want the option to scale to multiple devices and workflows
ONYX is probably not the best fit when:
- you want a design-first tool that also RIPs
- you do very low volume and don’t need automation
- you are locked into a single OEM workflow and it already works fine
Related reading on PrintReviewer
If you want more context around sticker production decisions, these two are worth it:
- Best Sticker Companies of 2026 – Ranked and Reviewed
- White Ink, Clear Materials, and Spot Colors: Beginner’s Guide
Conclusion
This ONYX RIP review boils down to one thing: ONYX is a workflow engine. It’s built to reduce manual steps, reduce operator mistakes, and make print-and-cut production repeatable.
If your sticker shop is growing, or you already have a few printers and cutters in motion, ONYX is a serious contender. Just treat it like a system, not a single piece of software. Build the Quick Sets, lock the defaults, and keep one person responsible for the “known good” presets. Your reprint pile will shrink fast.